Part 3 UV unwrapping

Hello, hello! and welcome back. Last time I reported on my progress, we had a look at how my 3D model of the asset required for my assessment, (a treasure chest) is looking.
I am glad to say, that this has now been completed, and now I’m ready to post an update about the next stage of the pipeline- my treasure chest’s UV wrap.

I’m struggling to come up with a comparison other than, a ‘net’ of a 3D shape that would describe UV unwrapping in a logical sense, so unfortunately that’s what you’re getting. UV unwrapping is HIGHLY important and plays a huge part in texturing later on. If you do a rushed job, it will certainly show.

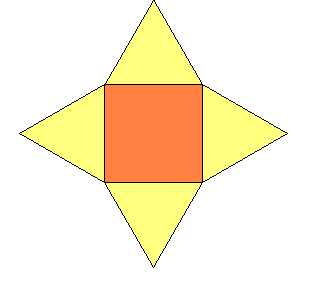
a 2D net of a Square based pyramid

UNWRAPPING.5

Side of Chest. Juxtaposed with UV editor, on the left.

Bottom of Lid

Sunken Vertices do not agree with the UV map.

Where to begin? This was also a lengthy process, and I learnt another important lesson about the problems you will run into when trying to prepare your UVs (those letters are interchangeable for X and Y by the way), with sunken vertices. Again this was due to a silly mistake ( I left the dreaded lock selection on) and although easily fixed, with some solid advice and a little bit of help from those who know better than I, this also was something I worked through slowly.

The checker pattern is merely used to get a good idea of the scale of the UVs on each part. All sides have to be the same in scale, unless you are deliberately choosing to make a specific part more low-res than another. (When following the tutorial, it was advised to make the UVS on the bottom of the chest a lower res than the other sides by making it smaller than the others.)

Eventually though, I found unwrapping to be relaxing after getting the hang of the controls and I think I can say I did learn through my mistakes.
I learned that making a good UV map is all about patience.
After all the UVs are projected correctly onto the UV canvas, the final step is to render out a uv map. This can be described as the guidelines for your texture.

This brings me to the next part of the post; texturing.

I went about texturing by attempting to follow along with the video tutorials given to us. This was one of the more successful stages of the build. I hardly ran into any soul-sucking, headache inducing trouble and was able to finish this in about a day.

The first step in texturing, is to open up your UVs in an image editing program, such as Photoshop, Gimp or Paint.net. I chose to use Photoshop to edit mine.
I followed the guide and began setting up my image ready for outlining.

this was taken as I was creating shadows for the top of my treasure chest.

this was taken as I was
creating shadows for the top of my treasure chest.

This is a fairly straightforward process, and it really does help to switch back into 3Ds max every now and then, just to see how your image is going. (Make sure to apply your image at a material in order to keep an eye on how things are going.)

Highlights have been added

Highlights have been added

Important details such as highlights and shadows are added for dramatic effect.

UV in Photoshop. Freshly Painted. Highlights, planks, outlines

UV in Photoshop. Freshly Painted. Highlights, planks, outlines

Finally, I opted to leave my treasure chest as it appears in the photo above the previous, for a more rustic look, rather than adding the fine detailing. Mostly due to time restrictions, however the finished product minus the extra detailing still has some nice visual aesthetics.

Week 2 of 3D production Pipeline Assignment 3D modelling


Hello and welcome to my 3D production pipeline blog. Last time I explained what Preproduction involves with an example of how it relates to my current coursework. I have now reached the next requirement of my assignment, 3D modelling. So, with that comes the perfect opportunity to relay what is involved in 3D modelling, and also show off my progress towards finishing my first assignment.


The brief of the assignment says that I am to model a specific asset that will be used in an animated advertisement for an upcoming mobile game… I have been given video tutorials, which I have been attempting to follow very closely.


modelled chest base. The inside of the chest was later modified so as to not have parts of it poking out on the exterior of the base

modelled chest base. The inside of the chest was later modified so as to not have parts of it poking out on the exterior of the base

As you can tell from the photo, this was taken about halfway through the first stage of modelling the chest. I later was advised to scale the edge down on the y axis, to stop it from clipping through.

unnamed

This stage probably took the longest for me to get through as I ran into a few problems with my model, particularly with the lid. The lid took a lot of perseverance for me to get through. But as it turns out, the only reason why the issue that the below picture outlines was occurring was that I had ‘locked my selection’ and that was why I couldn’t unselect specific vertices.

WRONG

The lesson learned is that if you run into a similar problem when you’re modelling. Check to see if your selection is locked.
You’ll know if it is, if you see something like this:

if this is turned on, and you're trying to unselect vertices/edges/polys. You will not be able to deselect until you turn this off. Hit spacebar to toggle it on and off.

If this is turned on, and you’re trying to unselect vertices/edges/polys. You will not be able to deselect until you turn this off. Hit spacebar to toggle it on and off.

With my treasure chest finally modelled, its time to move on to UV mapping.

The Treasure Chest- Preproduction

This week, however will be different. That is to say, we will be continuing with the topic of the 3D production pipeline, but in a more personal context.

Over several weeks I have been very busy modelling a treasure chest (amongst other things, which will be explained later) for my ‘Foundations of 3D modelling Class’. For someone such as myself, who has limited experience with 3D programs outside of playing around in Blender, it has been an interesting project to undertake thus far.

So, to get to the point about what this post will be: I will be showcasing my journey ambling through the 3D production pipeline. Without further adieu, I present, preproduction.

Preproduction in animation is usually the confirmation of what the film hopes to achieve in terms of visuals and story. This is communicated by using storyboards, (a series of drawings presented in a comic strip manner) (Gulati, P, 2010), layouts, (e.g. character’s outfits, locations, etc.) and finally model sheets. Which, as once again defined by Gulati as ” precisely drawn groups of pictures that show all of the possible expressions that a character can make, and all of the many different poses that they could adopt”.  (Gulati, P, 2010).

If we were to look at the creative brief of my assignment as an example, we would see the one of the phases of preproduction, a storyboard has been completed for us. Which, if we examine it closely, gives us all the information we need to begin.

Capture

A storyboard outlining animation and camera angles

With Preproduction taken care of for us. It is now time to make a start on the next stage of the 3D pipeline. Indeed one of the most important stages, 3D modelling.

Week 4: The First Feature Length 3D Animated Film: A Crucial Step in the Industry

Now, as the title of this post suggests, we are moving along and deviating slightly from a rigid overview of the key components of 3D animation and are looking at a major milestone in the industry- the first feature length film ever to hit cinemas. If you didn’t know exactly which film earned this title, I’ll tell you. It was Pixar’s ‘Toy-story’.

Although computer animation had been used previously in small sequences, in many different films (see example below), it was Pixar that pushed the genre forward with their 1995 film.

Shoot forward more than twenty years and it is clear that since then that this has had a massive impact on the industry, and with each new generation of technology allowing for 3D animation to become more extravagant, the industry has progressed into one dominated by 3D, and has become the ‘norm’ with recent films such as ‘Minions’ being an example of multiple production companies following suit in Pixar’s digital footsteps, along with Disney, who have not produced a 2D animated full length feature since 2009’s ‘The Princess and the Frog’.

Advancements in the industry have not only given birth to a whole new media for animation, but have also paved the way for incredible artists to emerge. One such artist, had caught my eye with his work at Irrational Games. Mike Snight, an environmental artist known primarily for his amazing work on Bioshock: Infinite, is an excellent example of just how much potential 3D artwork has. His blog, which is linked below, is an archive of his journey in the industry. Mostly he just shows off his modelling and level design work from Bioshock, but he also lists his own personal work as well. There’s nothing wrong with this and like many of his colleagues, his work is worth praise. If we were to look at for just a moment, his work on Bioshock Infinite we would see that he textures things beautifully. (see below)

ArtDeco_01model art deco pillar

That’s the key thing about Mike’s work that I like the most, I think. Everything is just subtly put together. Even something as simple as what appears to be a TV set from the 80s is rendered in an amazingly grungy style- as if the object had gone through some wear and tear due to the environment it might appear in.

3dm_TV

I don’t typically look at many artist’s blogs, and after undertaking my research for this post, I have decided that I shall look more closely at the work of others, because not only is it informative to do so, but I have found that it is inspiring.

I don’t know how my ability with 3D will develop over time, I might become as clever with the software available as the guys over at Pixar, or as talented as Mike Snight. One thing is for certain however, I’ve found an artist to look up to, and a target to reach for.

If you would like to find out more about the work above, please click this link to find a blog written by Mike Snight. http://www.mikesnight.com/

References:

Images:

Snight, M. (2015). Models. Mike Snight. Retrieved 4 July 2015, from http://www.mikesnight.com/models/

Video:

 Disney,. (2015). Hydra Disney’s Hurcules scene. Retrieved from http://https://www.youtube.com/watch?v=mZcy5-lSgQY

Week 3: RESEARCH AND DEVELOPMENT: What is Lighting, Rendering and Compositing?

Welcome to week three of my research and development blog, today we’ll be talking about three more aspects of the 3D production pipeline. Once again I will share with you what I have discovered about each of the three topics mentioned above in this week’s post’s title, so just to recap, today we’ll be going over what Lighting, Rendering, and Compositing consist of.

So, let us begin with what Lighting entails.

Being responsible for lighting would put you under the job title ‘lighting artist’, and according to an a blog post titled ‘step-by-step: How to create an animated movie’, this job comes with a huge amount of responsibilities, including, but not limited to “placing lights, defining light properties, defining how light interacts with different types of materials, the qualities and complexities of the realistic textures involved, how the position and intensity of lights affect mood and believability, as well as colour theory and harmony.” (Gulati, 2010).

example of how lighting can establish mood

example of how lighting can establish mood

Lighters also must make sure that their work matches up with what has been stipulated by the Directors, Production Designers, Art Directors and VFX Supervisors of the production. Being a lighting artist sounds like a handful with just the above tasks, but when you add in the added responsibility of maintaining continuity in all shots in the production, I have to say that I have found a lot of respect for these artists.

3941e63672588e7b4b345f266089eacb

To complete these tasks, computer generated light can be created with a typical 3D program, in laymen’s terms, by running a simulation.

But, if we look at a post on the subject of how exactly lighting is created, more is revealed about the elusive subject. There is one key thing to remember: “Without great lighting, even a fantastic 3D Model can end up looking flat and unconvincing in the final image.”- (Slick, n.d.)

According to the author of the post titled ‘Standard 3D Lighting Techniques’, “although it is quite easy to Even though it’s pretty easy to click the “create light,” button in your 3d Software Package and place a light source in your scene, the reality of the craft is far more complex”. (Slick, n.d.). Further reading of Slick’s (Yes, that is his real name) post confirmed what he outlined above. There are many different lighting options available and they all work best in different situations.

Next, we move on to Rendering.

Rendering is an action that is undertaken for the computer to collect and organise “the various components, variables, and actions in an animated scene and builds the final viewable result.”, (Sanders, u.d.) It is a standard and another highly important process, and without it, the quality of the animation would be sufferable at best, simply unwatchable at worst.

Finally, let’s talk about compositing. Compositing is defined as “the joining of two or more images to make a single picture”.  This process is the last one we will be discussing in this post, as it is important to leave the topic with the most gravitas last, I believe. An example of compositing would be blending an animated element with a realistic background, but there is far more too it than that. I will leave you with a photo summing up the entire process.

372

layers are brought together to form one beautiful image

Bibliography

Creativeskillset.org,. (2015). Compositor – Animation job Roles – Creative Skillset. Retrieved 18 June 2015, from http://creativeskillset.org/job_roles_and_stories/job_roles/358_compositor

Gulati, P. (2010). Step-by-Step : How to Make an Animated Movie. tuts+. Retrieved from http://cgi.tutsplus.com/articles/step-by-step-how-to-make-an-animated-movie–cg-3257

Holmes, S. (2011). 24 things you need to know about lighting | 3D Artist – Animation, Models, Inspiration & Advice | 3DArtist Magazine. 3dartistonline.com. Retrieved 18 June 2015, from http://www.3dartistonline.com/news/2015/04/24-things-you-need-to-know-about-lighting/

 Photo.stackexchange.com,. (2015). What software can I use for 3D lighting simulation?. Retrieved 18 June 2015, from http://photo.stackexchange.com/questions/10447/what-software-can-i-use-for-3d-lighting-simulation

Sanders, A. (2015). In Computer Animation, What is Rendering?. About.com Tech. Retrieved 18 June 2015, from http://animation.about.com/od/faqs/f/In-Computer-Animation-What-Is-Rendering.htm

Slick, J. Standard 3D Lighting Techniques. About Tech. Retrieved from http://3d.about.com/od/Creating-3D-The-CG-Pipeline/a/3d-Lighting-Techniques-Standard-3d-Lighting_2.htm


images:

 final image used. (2015). Retrieved from http://utdesign13.com/100-cool-photoshop-effects-tutorials-of-all-time/

Gulati, P. (2015). Christmas. Retrieved from http://pratikart.daportfolio.com/gallery/442282#3

Gulati, P. (2015). forest. Retrieved from http://pratikart.daportfolio.com/gallery/442282#8

Week 2: R&D, a look at UV Mapping, Texturing and Shaders, Rigging and Animation

Hello, and welcome to week two of my research and development blog. Last time we looked at practically everything that falls under the proverbial umbrella of preproduction, and examining what exactly 3D modelling involves. Well, now We’re back talking about the 3D production pipeline, with this week’s post covering, UV mapping, Texturing and Shaders, Rigging and finally, ANIMATION.

Without further adieu, Let’s begin with a brief overview of UV mapping.

“We do UV mapping because we want to put 2D texture onto 3D model”- (Digital Tutors, ‘ontto’, 2014)

UV mapping, is as the user from Digital Tutors mentions above, is an imperative process in the 3D Pipeline, and must be completed in order for a texture to be applied correctly without visual error. It involves taking a 3D mesh and ‘unwrapping it’ into a simple 2D net, so that textures are applied correctly.

This leads us into what Texturing and Shaders are all about. Texturing and Shaders are managed by Texture Artists, who work with “shading and surfacing departments, to create the textures of different objects in accordance with approved concept designs”. (Gulati, P, 2010) , Shaders can also be defined as a type of program responsible for shading different 3D assets. (example of texturing can be seen below)
Capture
Next up, we have rigging, another highly important phase of 3D modelling. “Rigging is the process of creating ‘connections’ between objects.” (digital tutors, 2014) Rigging is used in order to make animation of a 3D character/object less complicated, and fiddley. An example laid out by the digital tutors video I watched in order to complete my research on this process, is that the “Animation of a hand without a rig, would be almost impossible. We would have to animate small parts of the hand and key-frame the rotation and translation, then move onto the next part of the hand and continue the whole process”.
rigging
This is where rigging comes in handy, because once a rig is added to the character, it gives the Animator a higher degree of control over the newly created ‘skeleton’ if you will, and allows the animator to smoothly animate the object in a much faster time frame than an object without rigging applied.
differences between a fully rigged object and an un rigged object

Object without rigging applied

example of a rig structure

example of a rig structure

Finally, we come to Animation. Animation in 3D shares some of the same basic principles that you would find in a 2D production. According to Pratik Gulati, author of a post titled ‘Step-by-Step: How to make an Animated Movie’, and a 3D artist, the process of Animation hardly deviates from traditional 2D work in the sense “that the practice of meticulously planning a character’s performance frame by frame is applied in 3D graphics using the same basic principles and aesthetic judgments that were first developed for 2D and stop-motion animation”.  (Gulati, 2010)

Bibliography

Gulati, P. (2010). Step-by-Step : How to Make an Animated Movie. tuts+. Retrieved from http://cgi.tutsplus.com/articles/step-by-step-how-to-make-an-animated-movie–cg-3257

Digital Tutors,. (2014). CG101: What is Rigging?. Retrieved from https://www.youtube.com/watch?v=Np3StFeVmLk

Images:

(in order of appearance)

Lague, S. (2015). Blender Character Creation: Texturing. Retrieved from https://www.youtube.com/watch?v=JYBPXTful2g

Digital Tutors,. (2014). CG101: What is Rigging?. Retrieved from https://www.youtube.com/watch?v=Np3StFeVmLk

Week 1 Research and Development Blog: It Begins.

In order to better understand how to create a successful piece of media, it is prudent that an animation student (such as myself) familiarise themselves with the key concepts of the different stages of the 3D production pipeline. So with that in mind, the purpose of this blog is to not only keep a track of what I have learned about (hopefully) my field, but to share this information online, and pass on what I have learned to anyone who is interested.
This week, I’ll be sharing with you the reader what I have discovered about Preproduction and 3D modelling in the context of animation.
In any production be it a Hollywood produced standard film, or a short made by an unknown, there are 3 main phases. Preproduction, Production and Postproduction. Our focus is on Preproduction, where the magic of creating film begins. This stage of the film making process is not only one of the most important due to the fact that it is the stage where decisions regarding plotline, and the overall look of the film are finalised, through the act of storyboarding, the creation of layouts, model sheets and Animatics.
To find out just what these individual processes involve and to fully comprehend what is involved within Preproduction, it is necessary to talk about the aforementioned topics in a more specific manor.
Storyboarding has been labelled by an animator Pratik Gulati as “an essential stage of the animation process”. It is made up of a series of drawings, presented in a comic strip like manner and is used to both help visualise the animation and help communicate ideas in a succinct and efficient way. (See picture below for an example of a storyboard taken from Avatar: the Last Airbender) Gulati also states that storyboards also serve as an effective visual reminder of what the overall aim the whole team should be working towards.
avatar_301_storyboard_09_by_fierymonk

After storyboarding is complete, the next link in the chain are ‘layouts’. Put simply, this is the part of preproduction where the director works with the layout department in designing locations and say, different clothing for characters.
Next comes the model sheets, which as once again defined by Gulati as ” precisely drawn groups of pictures that show all of the possible expressions that a character can make, and all of the many different poses that they could adopt”. (Gulati, P, 2010) (see below for example)

89hncbms3

The final step in this long preproduction phase, are the Animatics. These are created in order to give a rough idea of “how the motion and timing of complex sequences might look in the final product.” (Gulati, P, 2010)This takes place after storyboarding, and these mock ups are used by the director to plan out the more complicated shots and how to go about staging them correctly.

Moving on to the next phase of the 3D Pipeline, let’s examine what 3D Modelling involves. Modelling, like preproduction is also a integral part of the process. Its a modeller’s job to work with Art Directors, the Visual effects supervisors, and Animation Supervisors to transform the traditional 2d concept art, and transform it into a 3D model. Its also a Modeller’s job to work with the technical animator, and the enveloper and often the shared task is sent back and forth, with the modeller sculpting facial expressions on characters and other fine details.  (see below)

F2MOJ91HIGILLKH_LARGE

After this is approved that’s when texturing and rigging comes in, which brings us to next week’s topic.

reference list:

Gulati, P. (2010, 9th June). Step-by-Step : How to Make an Animated Movie. [Weblog]. Retrieved 11 June, 2015, from http://cgi.tutsplus.com/articles/step-by-step-how-to-make-an-animated-movie–cg-3257

images used:

http://fierymonk.deviantart.com/art/Avatar-301-Storyboard-09-66333193

http://www.instructables.com/id/GEEK-molds-for-every-home-1/step1/3D-modelsketch/

found via google images